Each agent lives in a
project. In the
dashboard, the New project wizard creates the project and its first agent
in three steps. The API creates the agent and its project in one request.
This guide builds an agent that runs on the SLNG orchestrator. To run the
agent in your own code on LiveKit, Pipecat, or a custom client instead, see
Improve an agent.
Dashboard
API
On the Projects page, click New project, then click Start
building on the Build an agent card.
The first step of New project. Choose Build an agent.
One request to the Managed Agents API creates the agent and its
project. The body carries the agent’s identity and its model config.
This is the complete body. The next steps show where each value comes
from.
agent.json
{ "name": "Support agent", "region": "eu-central", "language": "en", "system_prompt": "You are a support agent for Wayne Enterprises.", "greeting": "Hi, how can I help you today?", "models": { "stt": "deepgram/nova:3", "llm": "bedrock-mantle/nvidia.nemotron-super-3-120b:latest", "tts": "slng/fish/tts:s2.1-pro", "tts_voice": "16cabdb7f8d240569aff36c9e480d783" }}
2
Pick a template
Templates prefill the pipeline, prompt, and voice for an industry. You can
change any of it later.
Dashboard
API
Keep From scratch to choose every piece yourself, or select a
template such as Healthcare or Insurance. Click Continue.
Start from scratch or from an industry template.
There is no template field. Set the prompt, greeting, and models a
template would prefill directly in the body. The speech model needs a
voice ID as well.Prefer models under the slng/ prefix where one exists. They run on
SLNG infrastructure in the region you pick, so each turn skips the hop
to an outside provider. Fish Audio S2.1 Pro is SLNG hosted in every
region. The models allowed depend on region and language. See the
model availability guide.
agent.json
{ "name": "Support agent", "region": "eu-central", "language": "en", "system_prompt": "You are a support agent for Wayne Enterprises.", "greeting": "Hi, how can I help you today?", "models": { "stt": "deepgram/nova:3", "llm": "bedrock-mantle/nvidia.nemotron-super-3-120b:latest", "tts": "slng/fish/tts:s2.1-pro", "tts_voice": "16cabdb7f8d240569aff36c9e480d783" }}
3
Name the project and choose a region
Pick the region closest to your callers. Region sets the latency floor for
every turn of the conversation and filters which models you can use. See
the regions map for the full list.
Dashboard
API
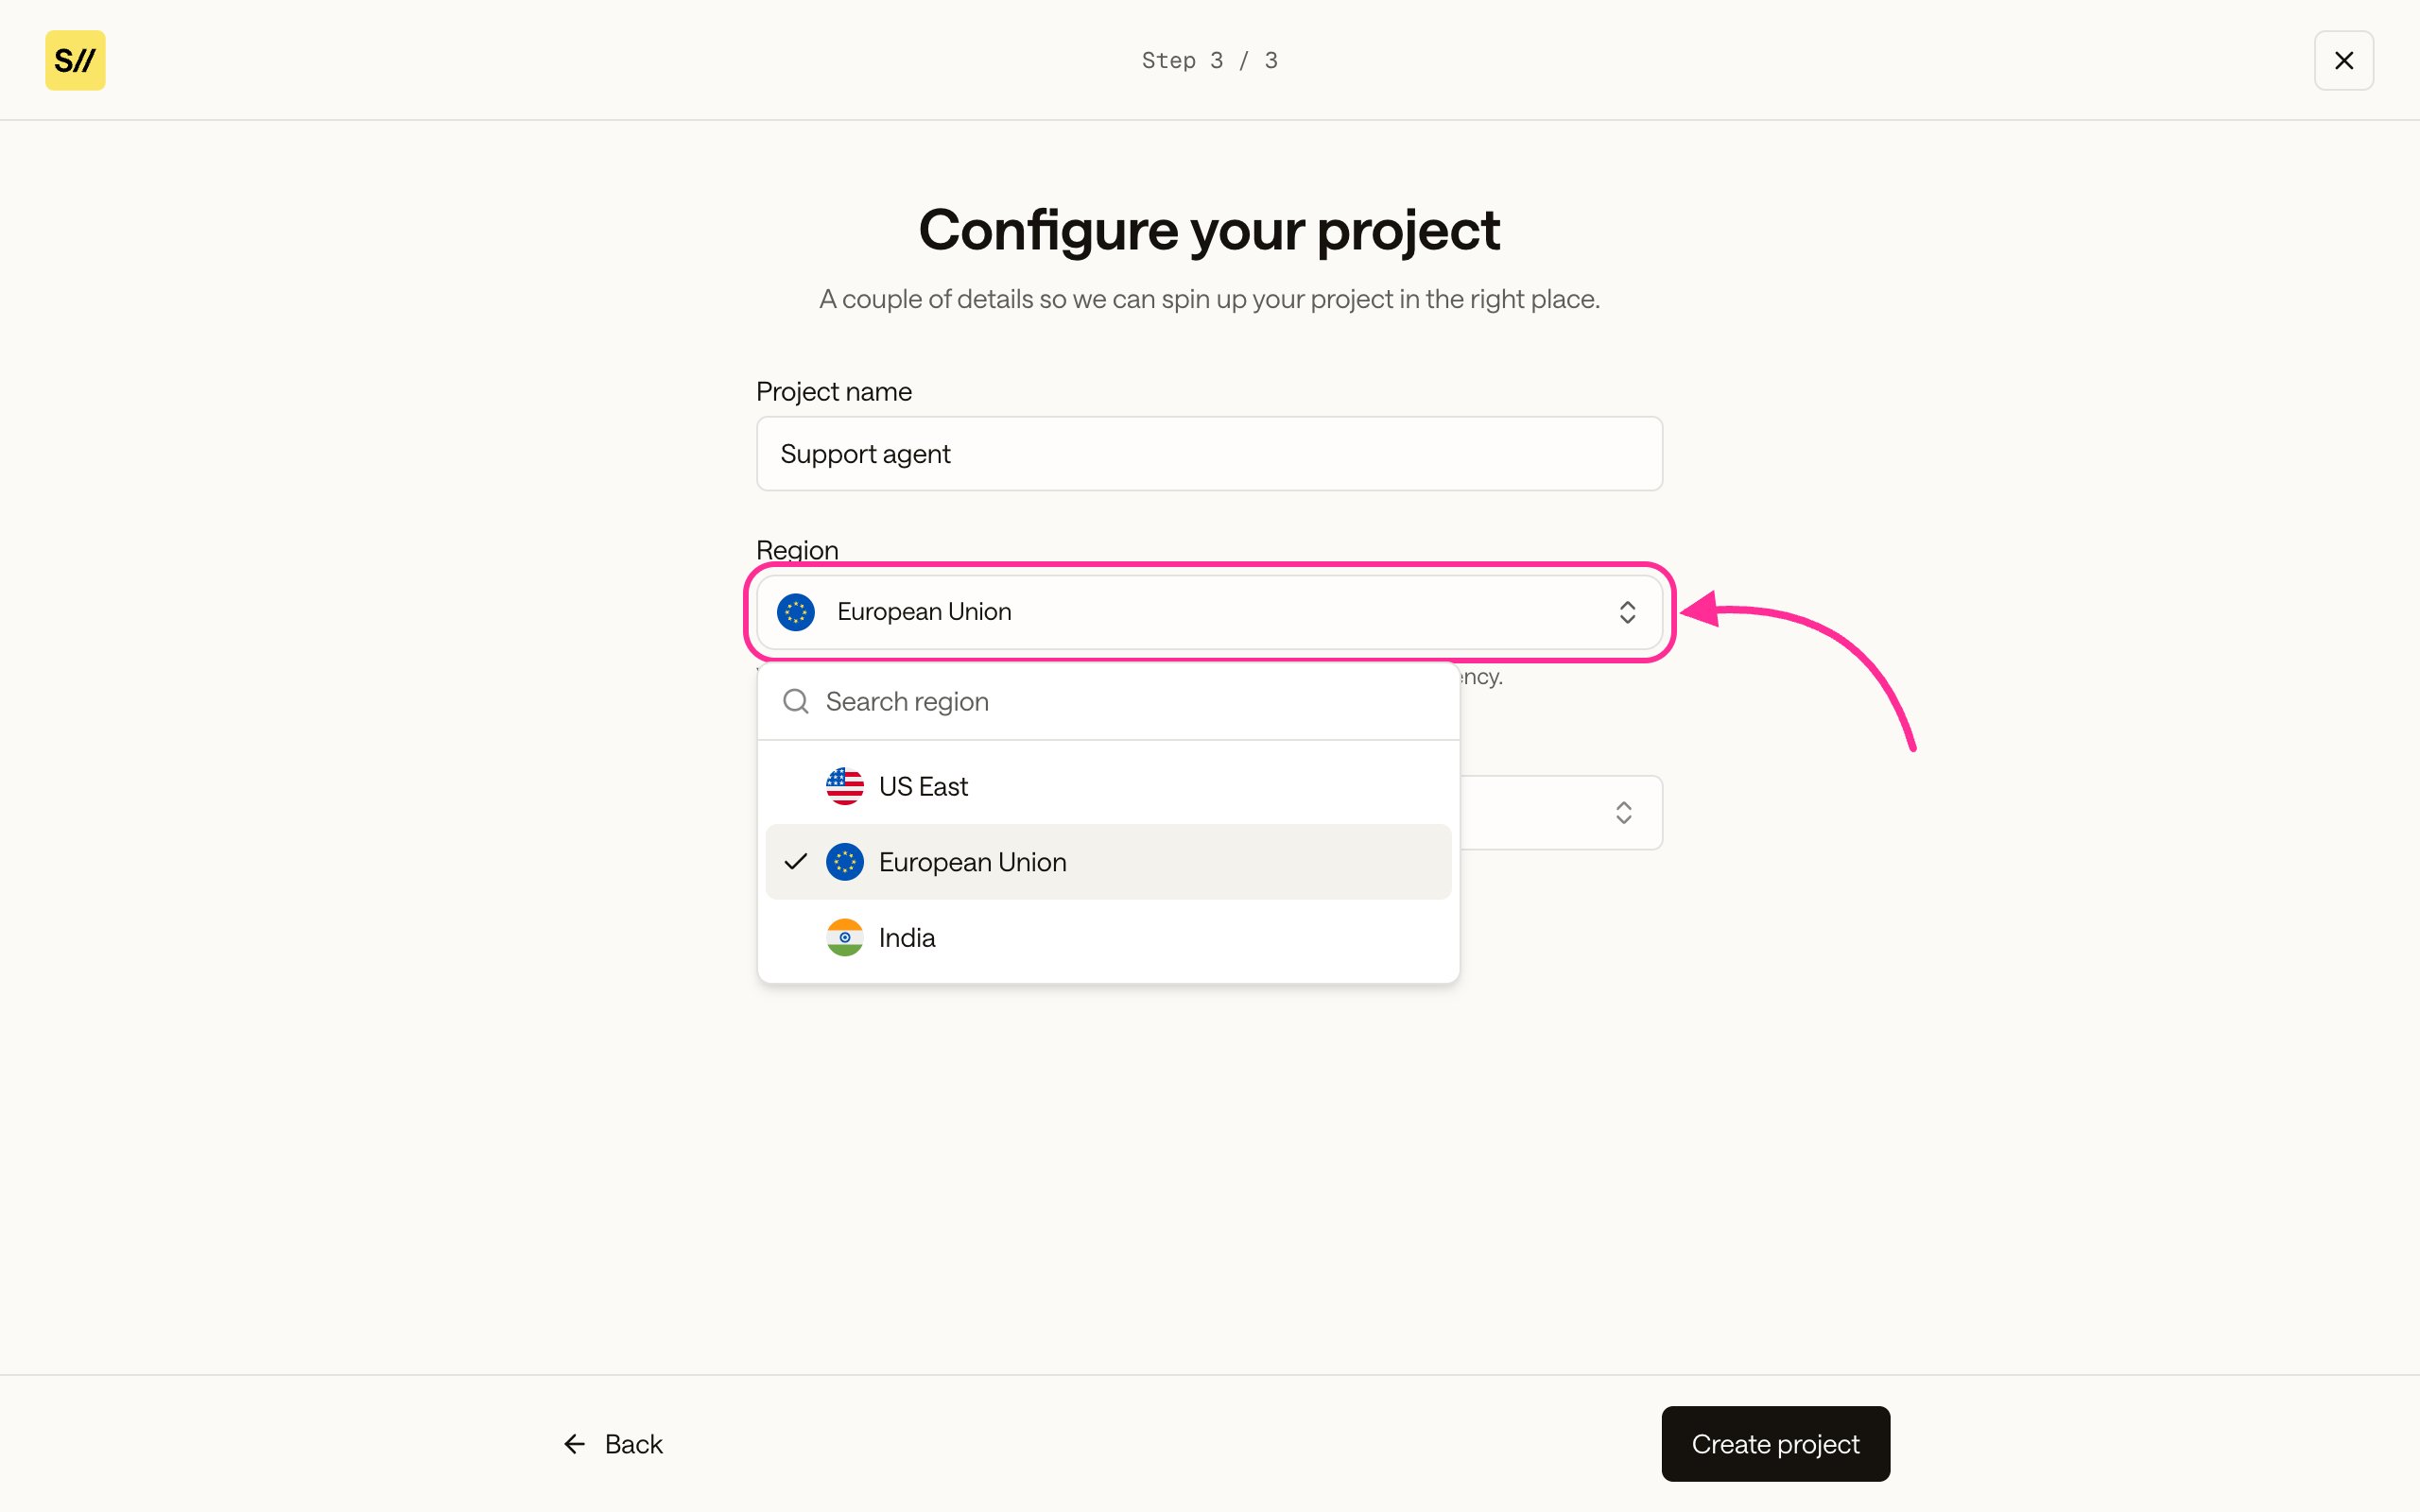
On the Configure your project step, enter a Project name, then
open the Region dropdown and pick a region.
The region selector on the Configure your project step.
The name and region are the first two fields of the body. The agent’s
name becomes the project’s name.
agent.json
{ "name": "Support agent", "region": "eu-central", "language": "en", "system_prompt": "You are a support agent for Wayne Enterprises.", "greeting": "Hi, how can I help you today?", "models": { "stt": "deepgram/nova:3", "llm": "bedrock-mantle/nvidia.nemotron-super-3-120b:latest", "tts": "slng/fish/tts:s2.1-pro", "tts_voice": "16cabdb7f8d240569aff36c9e480d783" }}
4
Choose a language and create
The primary language filters models to the ones that support it and sets
the default speech to text and text to speech choices.
Dashboard
API
Open the Primary language dropdown, pick the language your callers
speak, then click Create project.
Primary language selector and the Create project button.
The wizard closes and opens the new project on its Listen section.
The language is the last field.
agent.json
{ "name": "Support agent", "region": "eu-central", "language": "en", "system_prompt": "You are a support agent for Wayne Enterprises.", "greeting": "Hi, how can I help you today?", "models": { "stt": "deepgram/nova:3", "llm": "bedrock-mantle/nvidia.nemotron-super-3-120b:latest", "tts": "slng/fish/tts:s2.1-pro", "tts_voice": "16cabdb7f8d240569aff36c9e480d783" }}
The response is the full agent object, most of it defaults you did
not set. Keep the id. Every later call that changes the agent uses
it. The project appears on the Projects page under the agent’s
name. The highlighted lines are the ones you sent. Expand the block to
see the rest.
Response
{ "id": "1c5639ea-98f2-48bc-80c0-f8e41b2c3fca", "organisation_id": "18205771-aea9-4730-977d-cd05f807b0e8", "name": "Support agent", "system_prompt": "You are a support agent for Wayne Enterprises.", "greeting": "Hi, how can I help you today?", "inbound_greeting": null, "outbound_greeting": null, "language": "en", "region": "eu-central", "models": { "stt": "deepgram/nova:3", "llm": "bedrock-mantle/nvidia.nemotron-super-3-120b:latest", "tts": "slng/fish/tts:s2.1-pro", "tts_voice": "16cabdb7f8d240569aff36c9e480d783", "stt_kwargs": {}, "llm_kwargs": { "top_p": 0.95, "timeout": 30, "extra_body": { "chat_template_kwargs": { "enable_thinking": false } }, "temperature": 1, "tool_choice": "auto", "parallel_tool_calls": false, "max_completion_tokens": 6144 }, "tts_kwargs": { "latency": "balanced" }, "fallbacks": { "stt": [], "llm": [], "tts": [] }, "stt_final_timeout_s": null, "llm_first_token_timeout_s": null, "tts_first_audio_timeout_s": null, "failure_audio_enabled": true }, "models_validation_error": null, "idle_nudges": { "enabled": true, "first_nudge_delay_seconds": 15, "second_nudge_delay_seconds": 30, "hangup_delay_seconds": 15, "first_nudge_text": "Are you still there?", "second_nudge_text": "I'm still here. If you need a moment, just let me know. Otherwise, I'll have to end the call soon.", "final_hangup_text": "I'll end the call now. Feel free to call back when you're ready." }, "enable_interruptions": true, "noise_cancellation_enabled": true, "tts_cache_enabled": true, "tool_mode": "shared", "tools": [], "tool_refs": [], "mcp_refs": [], "runtime_variables": [], "livekit_deployment": "default-eu", "sip_inbound_trunk_id": null, "sip_outbound_trunk_id": null, "template_variables": {}, "created_at": "2026-09-09T15:25:34.707309Z", "updated_at": "2026-09-09T15:25:34.707309Z", "deleted_at": null}
A project with a linked agent that has a name, a region, a language, and
default models. It cannot take a call yet. The agent still needs its three
sections configured, and the project page opens on the first one.